If you want birria that melts and tastes like it was coaxed for days, you have to start hours ahead. Slow braising turns tough collagen into silky gelatin, chiles and acid sink deep into the meat, and searing with deglazing builds those deep savory notes. Resting and chilling concentrates the consomé, so tacos finish fast but still deliver layered flavor and texture, and there’s one essential timing trick that ties it all together. After more than 37 years tending pits the way our Vaqueros Texas Bar-B-Q crew does, I speak from the same proud, down-to-earth tradition that raised Texas BBQ and barbecue, where hickory smoked and other smoked meats like brisket taught us patience and respect for time.
Birria Timing at a Glance (Hours and Outcomes)
When you plan birria, think in clear time blocks: 2–3 hours gives you tender, sliceable meat with good flavor, 4–6 hours yields fall-apart, juicy shreds perfect for tacos, and 8+ hours, or overnight, deepens the sauce and produces the richest, most gelatinous texture.
Choose a timeline based on service needs, shorter for firmer slices that hold shape, medium for shreddable fillings that soak up consomé, and long for a luxurious mouthfeel and concentrated sauce.
Temperature and liquid matter, maintain a gentle simmer or low oven heat, and keep enough braising liquid to cover or partially submerge.
Rest briefly before slicing or shredding so juices redistribute, then rewarm gently before assembly.
If you’re coming from a Texas BBQ or pitmaster background, think of birria like a cross between slow-smoked brisket and other smoked meats: low-and-slow breakdown of connective tissue creates that tender, flavorful result many barbecue lovers seek.
Use steady heat and enough liquid, and the timing will deliver the texture you want.
Best Cuts for Birria
Choose cuts that balance connective tissue, fat, and flavor, those three elements determine whether your birria will shred silky or slice neatly. You’ll favor beef chuck for its marbling and collagen, it breaks down into tender, juicy strands after long, gentle cooking. Short rib or beef shank give richer mouthfeel thanks to marrow and sinew, ideal when you want pronounced beefiness and a gelatinous braise. For leaner, firmer results, brisket flat or sirloin tip can work if you adjust cooking time and liquid to prevent dryness. If you use lamb, shoulder mimics beef chuck’s behavior. Trim excessive fat, but don’t overdo it, some fat renders and carries flavor. Choose based on the final texture you want, then cook low and slow for best results.
If you’re coming from a Texas BBQ or smoked meats background, think about the same principles you use for brisket and other barbecue cuts. A pitmaster’s eye for marbling and connective tissue will help you pick the right piece, and techniques like hickory smoked seasoning can add a complementary layer of flavor without masking the meat.
Marinade: What Chiles, Acid, and Salt Do
Although the dried chiles provide most of birria’s smoky, fruity heat, the interplay of chile, acid, and salt is what shapes flavor, tenderizes meat, and balances the finished dish.
You’ll use rehydrated guajillo, ancho, and sometimes pasilla for depth, and they give fruity, raisiny, mild-berry notes rather than pure heat.
Acid from vinegar or citrus brightens and lifts those flavors, cutting through fat so the profile doesn’t feel heavy.
Salt seasons and also helps proteins retain moisture during the long cook, so don’t skimp.
Together, chile, acid, and salt create a marinade that penetrates and begins breaking down connective tissue.
Marinate several hours or overnight for even flavor and improved tenderness, then drain excess liquid before proceeding.
Sear First, Then Simmer
Start by patting the marinated meat dry, then sear it in a hot, lightly oiled pan until a deep brown crust forms. That browning creates complex savory flavors through the Maillard reaction and helps the meat hold its shape during the long simmer.
Once every side is richly caramelized, transfer the pieces to your braising pot. Deglaze the pan with a splash of stock or the reserved marinade, scraping up browned bits, and add that liquid to the pot for extra depth.
Searing concentrates juices and builds a flavor foundation the simmer can amplify. You’ll notice better texture and a glossy, flavorful braising liquid when you sear first, so don’t skip this step if you want defined bites and layered savory notes reminiscent of slow-cooked Texas BBQ and other smoked meats.
Low‑and‑Slow vs. Pressure Cooking for Birria
When you’re deciding between low-and-slow braising and pressure cooking for birria, think about texture and time. Slow braising at a low temperature gives collagen time to melt into silky, pull-apart meat and deepens flavors, while a pressure cooker delivers tender results much faster, though it can compress some flavor development and change the liquid’s concentration.
Choose low-and-slow when you want complexity and a glossy, reduced consommé that clings to the meat, patience rewards you with nuanced spice integration and controlled evaporation. Use a pressure cooker when you need speed without sacrificing juiciness, but monitor seasoning and dilution, since flavors won’t evolve as gradually.
Either way, finish with a quick rest before shredding so juices redistribute and the texture holds. If you enjoy the same slow, meaty joy found in Texas BBQ and other smoked meats, think of braising as a stovetop cousin to brisket and hickory smoked barbecue, all about time and gentle heat; pressure cooking is the shortcut that still respects the meat.
How Long to Cook: Temps, Textures, and Cues
If you want tender, pull-apart birria, aim for connective tissue to dissolve rather than just cook the meat through. Low braises typically run 3–6 hours at 300–325°F (150–160°C), or a gentle 2–3 hours at low pressure in an electric pressure cooker. High-heat short braises or stovetop simmering can take 2–4 hours depending on cut and size. Pay attention to texture, collagen turning to gelatin gives silkiness and mouthcoating, while overcooking fat can leave the meat mushy. Keep a steady simmer, large bubbles or boiling jostle fibers and dry surfaces. Use a thermometer to maintain oven or liquid temperature, and skim excess foam or fat periodically so flavors concentrate evenly. Rest the cooked meat in its braising liquid to retain juices before handling.
For cooks familiar with Texas BBQ and smoked meats, think about how those low-and-slow principles translate to braising, especially when working with cuts like brisket that benefit from long, gentle cooking. A pitmaster’s patience with temperature and texture pays off here too, resulting in rich, tender meat.
How to Test Doneness for Shredding
Feeling the meat give under a fork tells you more than elapsed time. For shreddable birria you want strands that separate cleanly with little resistance and a glossy, gelatin-coated surface. To test, pierce the thickest part with a fork and twist gently; the meat should pull apart without shredding into mush. Try lifting a chunk with tongs, if it saggers and the grain’s obvious, it’s ready.
Probe with an instant-read thermometer, target collagen-conversion temperatures around 195–205°F (90–96°C) in the center but don’t rely solely on numbers. Check individual pieces near bones, connective tissue there takes longer. If you hit firm spots, return the pot to low heat and check every 15–30 minutes. When strands separate easily and juices are gelatinous, you’ve reached doneness.
These same checks apply whether you’re working with birria or other slow-cooked smoked meats like brisket from a hickory smoked pit. A thoughtful pitmaster trusts feel and appearance as much as the thermometer.
Resting and Shredding for Perfect Texture
After you pull the pot off the heat, let the birria rest long enough for the juices and melted collagen to redistribute, about 20–30 minutes for a whole shoulder or larger roast.
This allows the meat to firm just enough to shred without tearing.
After resting, transfer pieces to a cutting board or tray and use two forks or clean hands to pull along the grain into long, tender shreds.
Keep some larger chunks for texture variation.
Skim any excess fat from the surface and fold reserved braising liquid back in sparingly to moisten, aim for glossy, supple strands, not soupy meat.
Taste as you go and adjust salt.
Hold shredded birria loosely covered at room temp briefly, then keep warm gently until you assemble tacos.
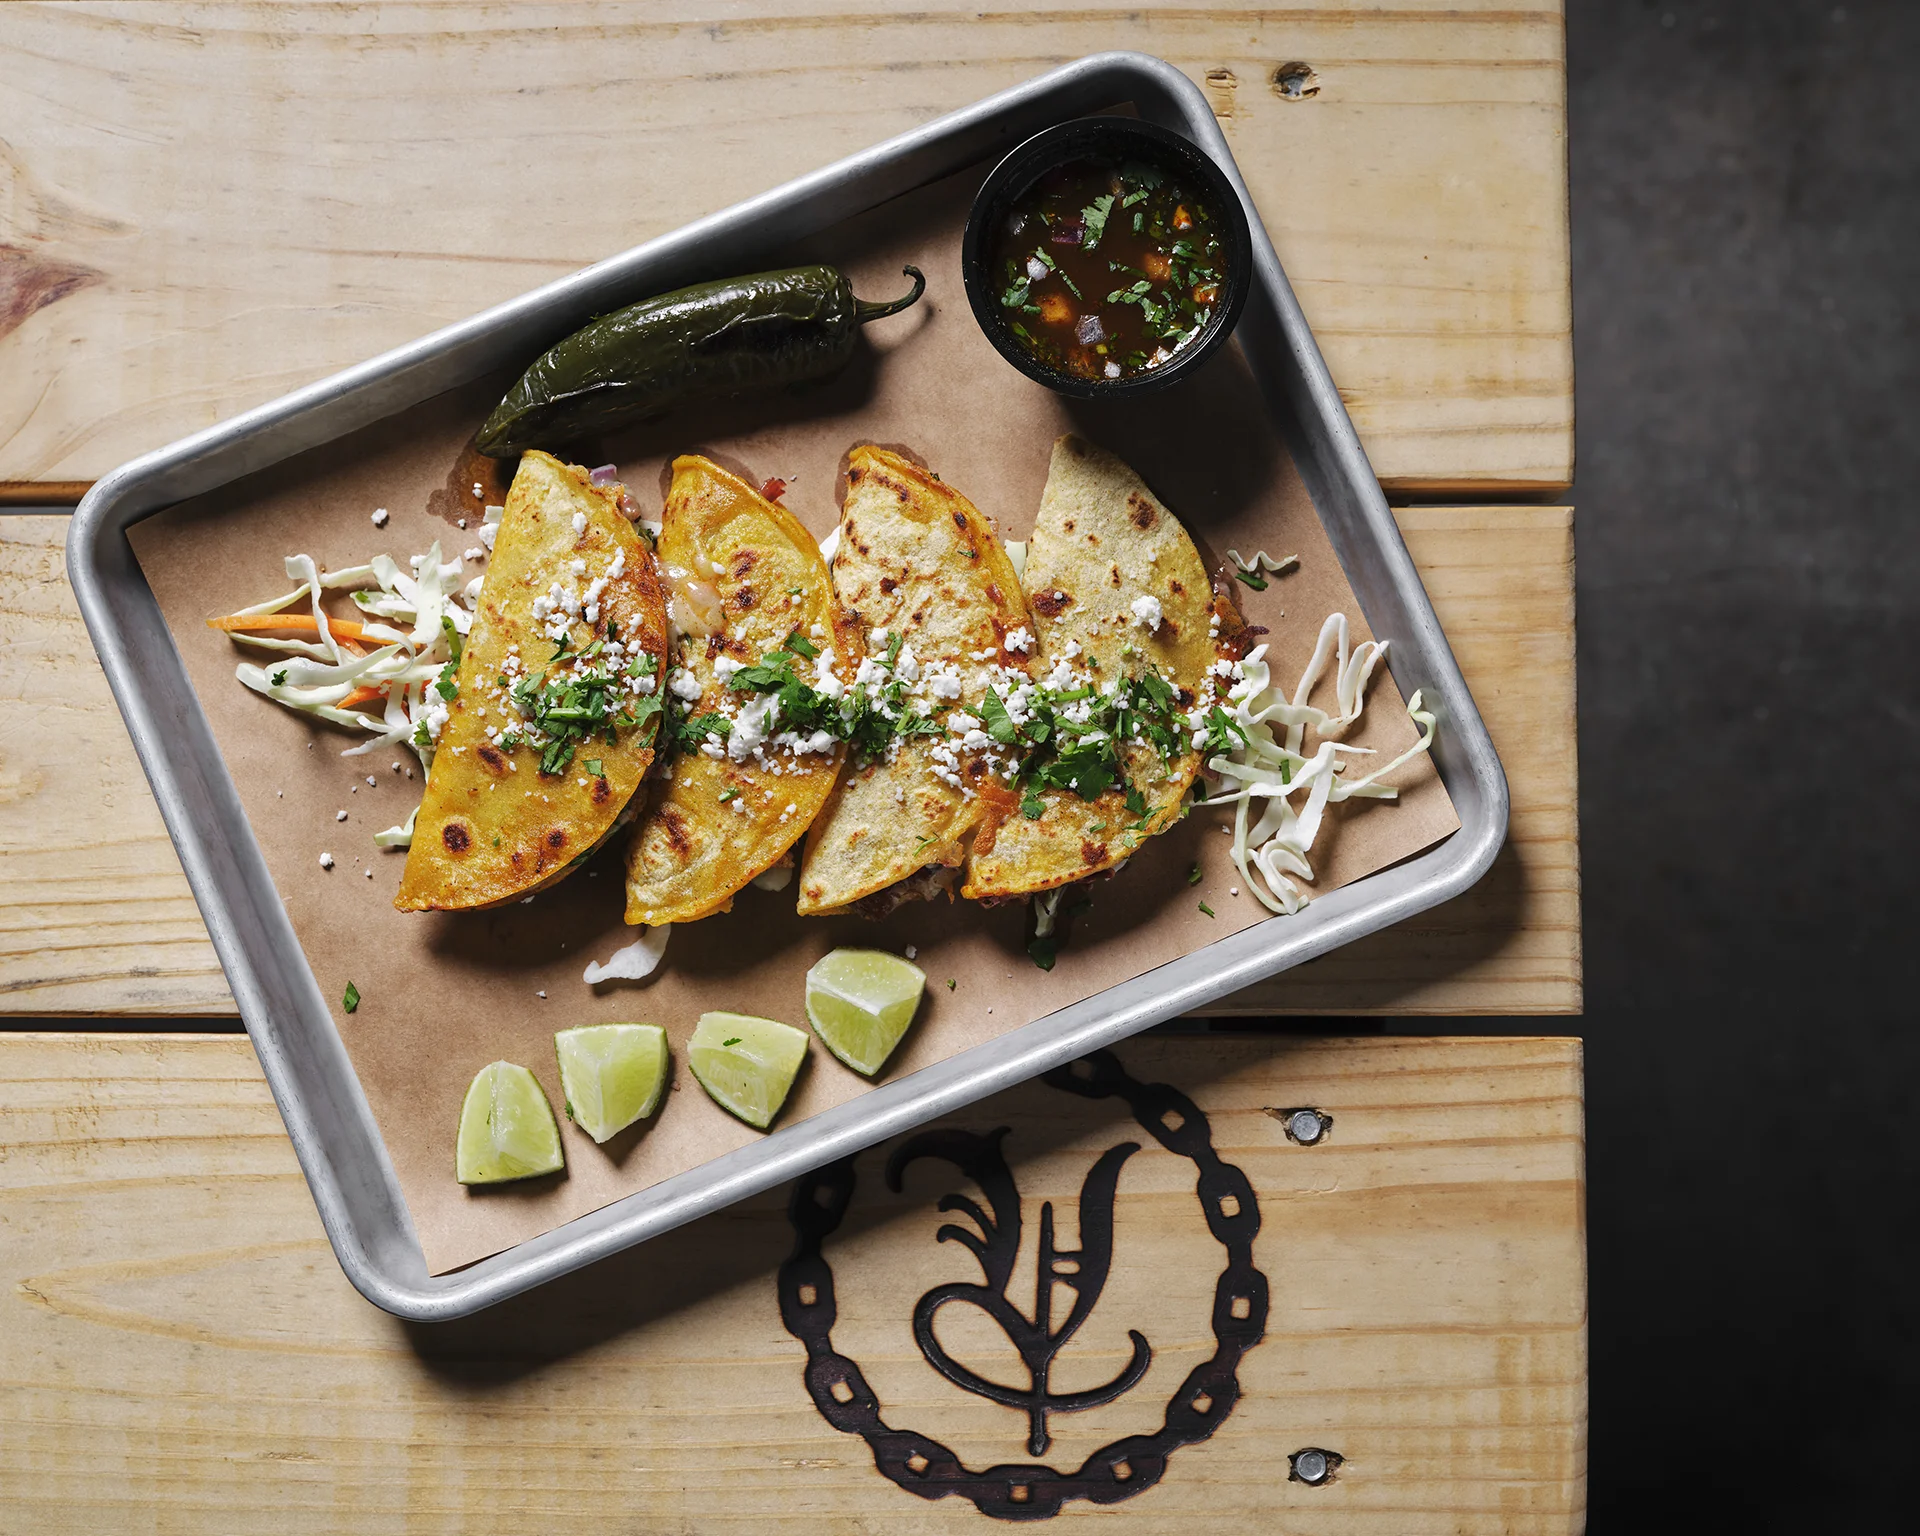
Make a Rich, Dunkable Consomé
Now that your meat is rested and shredded, use the reserved braising liquid and bones to create a concentrated consomé that will make your tacos dunk-worthy.
Skim any excess fat from the surface, then bring the liquid to a gentle boil to reduce and intensify the flavor. Add a halved onion, garlic, bay leaves, and a few peppercorns for depth. Taste as it reduces and adjust salt sparingly.
Strain through a fine mesh, pressing the solids to extract gelatin and flavor, then return the clear liquid to a low simmer to concentrate further if needed. Keep the consomé warm and covered.
Serve it alongside tacos in small bowls for dunking, using the glossy, flavorful broth to amplify every bite without overpowering the meat.
Schedule and Quick Fixes When You’re Short on Time
If you’re short on time, prioritize steps that lock in flavor. Braise the meat the day before and refrigerate, so you only need to reheat and shred when you’re ready to assemble. Plan backward: count serving time, subtract resting and chilling, then set the braise to finish early morning or the night before. Use a slow cooker or pressure cooker to replace long stovetop braises, a pressure cooker cuts hours to about an hour plus sautéing. Make consomé and sauce ahead, strain and cool, then skim fat after chilling. Keep tortillas warm in a towel or low oven. If you’re rushed, crisp tacos on a hot griddle and dip in warm consomé for instant depth without extra steps.
For a Texas BBQ feel, consider using hickory smoked or other smoked meats when possible. Brisket or other smoked cuts held overnight gain flavor and are easier to slice or shred the next day. A pitmaster’s approach of low-and-slow for the main cook, followed by simple reheating and finishing touches, gives you real barbecue flavor with minimal last-minute work.